Installing OpenCV 4 on macOS
In this post I will provide a bash script to install OpenCV 4.1.0 (with Python 3.6) on macOS Mojave and High Sierra.
OpenCV 4 was released on 20 November 2018. There have been many bug fixes and other changes in these versions.
First, we will install Xcode and Homebrew.
From there, we will set up Python virtual environments.
Then we will compile OpenCV 4 from source. Compiling from source gives us full control over the compilation and build, and lets us install the full version of OpenCV 4.
Step 1: Install Xcode
First, install Xcode. This installs the C compiler on the Mac, and the easiest way to install Xcode is through the App Store. Open the Apple App Store, search for the Xcode app and install it. It will take a while. In the meantime, you can make yourself a coffee.
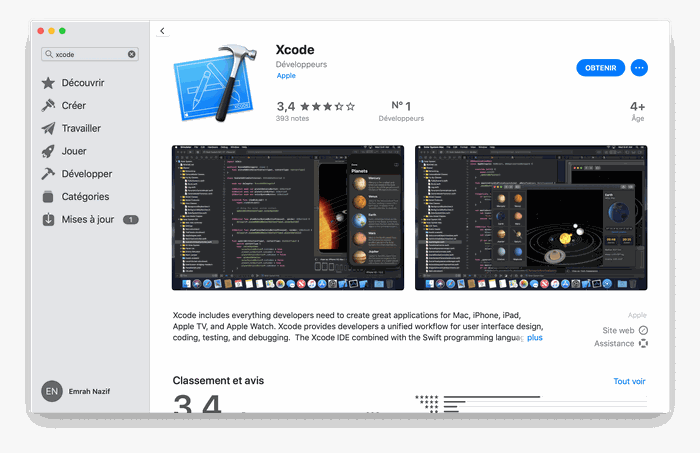
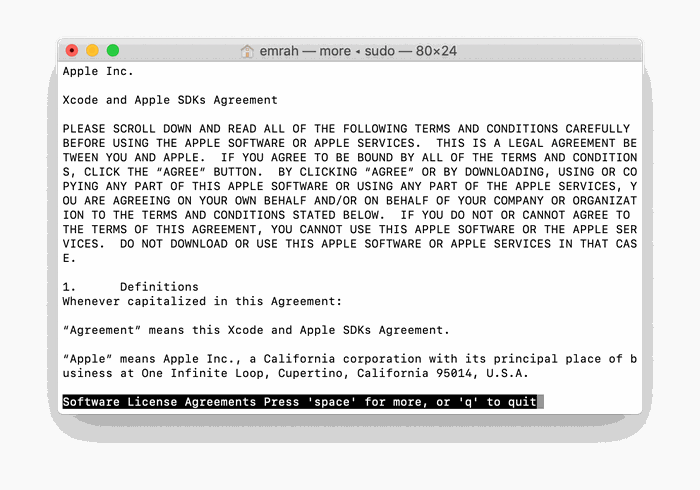
Once Xcode is installed, we need to accept a license agreement. Open a terminal and enter the following command:
$ sudo xcodebuild -licenseTo accept the license, scroll down and accept it. Press space to scroll down and type "agree" to accept.
After that, install the Xcode Command Line Tools with the following command.
$ sudo xcode-select --install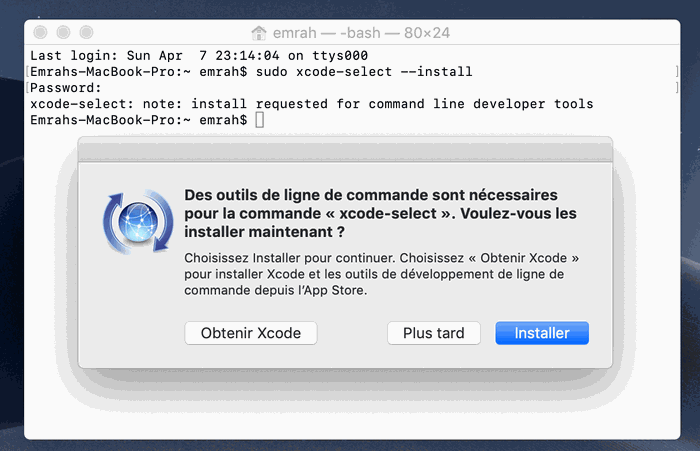
Step 2: Install Homebrew
In this step we will install Homebrew, the Mac community's package manager. Homebrew lets us install packages with just a few commands.
$ /usr/bin/ruby -e "$(curl -fsSL https://raw.githubusercontent.com/Homebrew/install/master/install)"Let's update Homebrew:
$ brew update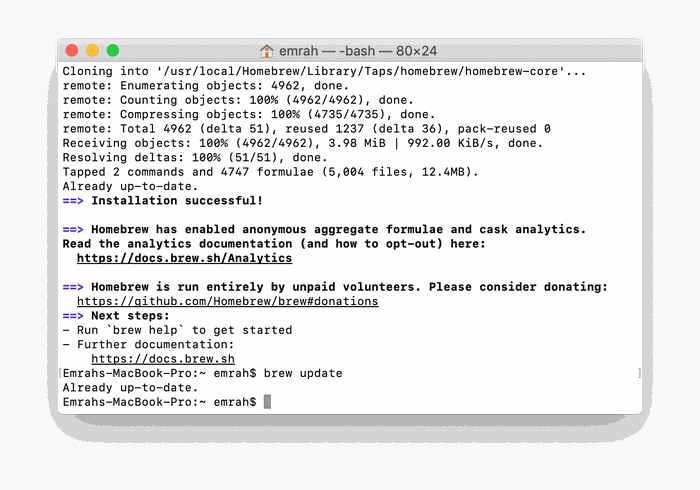
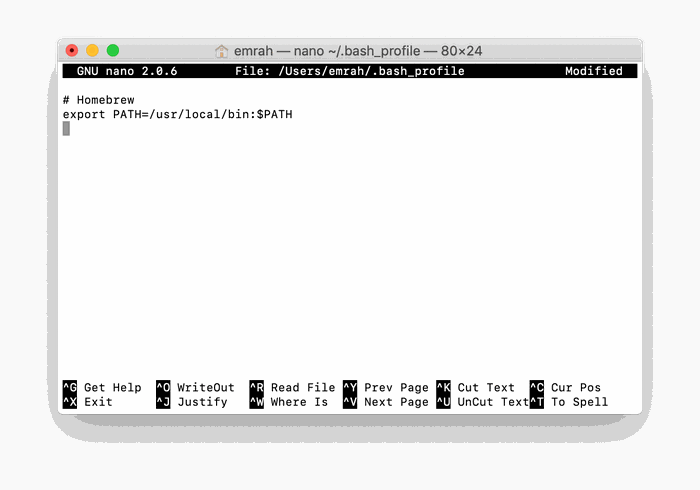
Let's edit your Mac's bash_profile. This script runs every time you open a terminal. I use the nano text editor.
$ nano ~/.bash_profileAdd the following lines at the end to update your path:
# Homebrew
export PATH=/usr/local/bin:$PATH
Save the profile [control + o].
Then use the source command to load the changes from the file (or close and reopen your terminal).
$ source ~/.bash_profileStep 3: Install the OpenCV prerequisites with Homebrew
In this section we will make sure Python 3.6 is installed. We will also install the prerequisites for compiling OpenCV from source.
It's very important to use Python 3.6. By default, High Sierra and Mojave come with Python 3.7. But Python 3.7 isn't supported by Keras / TensorFlow (we will use both later for deep learning).
Install Python 3.6.5:
$ brew install https://raw.githubusercontent.com/Homebrew/homebrew-core/f2a764ef944b1080be64bd88dca9a1d80130c558/Formula/python.rb
$ brew switch python 3.6.5_1
If you didn't get any errors, perfect! Please continue below.
Info: you may get an error like:
Error: python contains a recursive dependency on itself:
python depends on sphinx-doc
sphinx-doc depends on python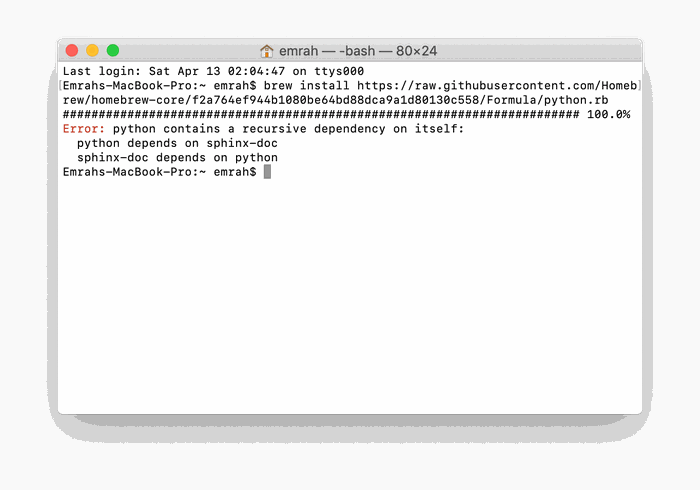
The problem is that sphinx-doc depends on Python 3.7, and Python 3.6.5 depends on sphinx-doc, which depends on Python 3.7.
Let's fix the circular dependency.
First, install Python 3.7 (which we will downgrade later):
$ brew install python3Now we need to remove the circular dependency.
Edit the Homebrew formula for sphinx-doc, since that's where the problem is:
$ nano /usr/local/Homebrew/Library/Taps/homebrew/homebrew-core/Formula/sphinx-doc.rbNow find the Python dependency and comment it out by putting a # in front of it:
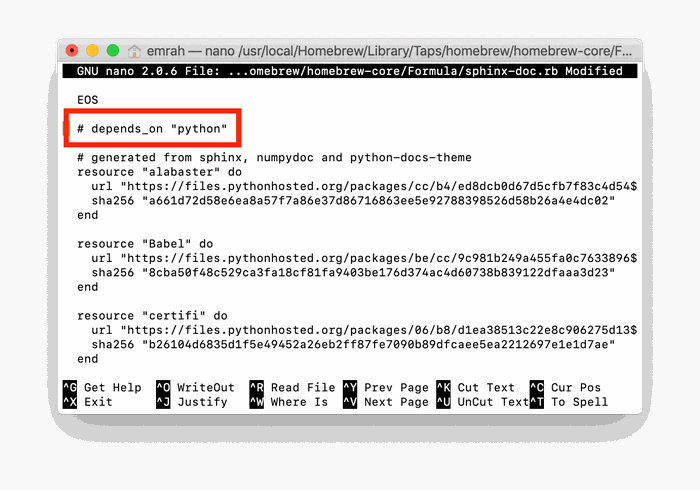
Once you've added the # to comment out that line, save and exit.
From there, just reinstall sphinx-doc:
$ brew reinstall sphinx-docInstall Python 3.6.5. The first step is to unlink Python:
$ brew unlink pythonAnd from there, we can install Python 3.6:
$ brew install https://raw.githubusercontent.com/Homebrew/homebrew-core/f2a764ef944b1080be64bd88dca9a1d80130c558/Formula/python.rbYou should check which Python is being used:
$ which python3
/usr/local/bin/python3
$ python3 --version
Python 3.6.5
Look at the output of the first command: you should see local/ between /usr/ and bin/python3.
We are using Python 3.6.5!
Check that we are using the right Python:
$ which python3If you see /usr/local/bin/python3, you are using the Homebrew Python (which is good). If you see /usr/bin/python3, you are using the system Python and you need to fix your bash profile and/or source it.
Install the other OpenCV prerequisites
These packages are build and compilation tools, libraries for image manipulation, or optimisation libraries.
To install these prerequisites for OpenCV on macOS, run the following commands:
$ brew install cmake
$ brew install pkg-config
$ brew install jpeg
$ brew install libpng
$ brew install libtiff
$ brew install openexr
$ brew install eigen tbb
$ brew install wget
Step 4: Install the Python dependencies for OpenCV 4
In this step we will install the Python dependencies for OpenCV 4.
With the wget tool we just installed, let's download and install pip:
$ wget https://bootstrap.pypa.io/get-pip.py
$ sudo python3 get-pip.py
pip: a Python package manager
Now that pip is installed, we can install virtualenv and virtualenvwrapper, two tools for managing virtual environments.
Python virtual environments are a best practice for Python development, and I strongly encourage you to take full advantage of them.
Let's install virtualenv and virtualenvwrapper:
$ sudo pip3 install virtualenv virtualenvwrapper
$ sudo rm -rf ~/get-pip.py ~/.cache/pip
From there, we need to edit our bash_profile again so these two tools work properly.
$ nano ~/.bash_profileAdd these lines at the end of the file:
# virtualenv and virtualenvwrapper
export WORKON_HOME=$HOME/.virtualenvs
export VIRTUALENVWRAPPER_PYTHON=/usr/local/bin/python3
source /usr/local/bin/virtualenvwrapper.sh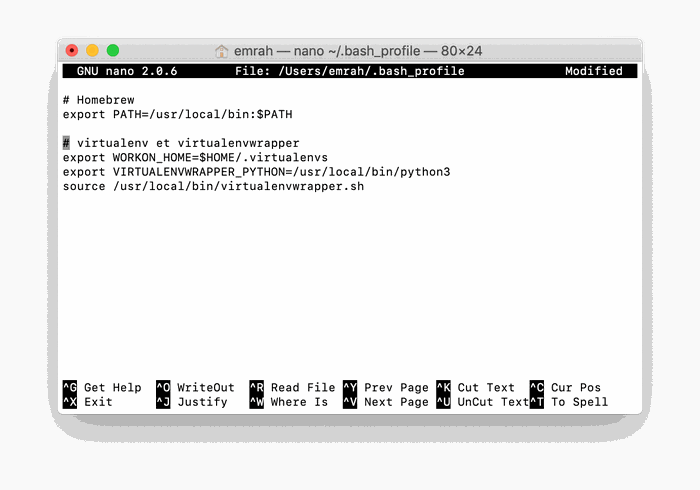
Source the file:
$ source ~/.bash_profileThe virtualenvwrapper tool gives us a number of terminal commands. You can read the documentation here.
Let's use the first command to create a Python virtual environment for OpenCV:
$ mkvirtualenv cv -p python3Note that cv is the name of our environment, and that I'm creating a Python 3 environment.
Reminder: note in the output that Python 3.6 is used for the environment too. You can name your environment differently if you like, and create several environments with different names to make development easier.
The environment is already active, but just in case, let's activate it:
$ workon cv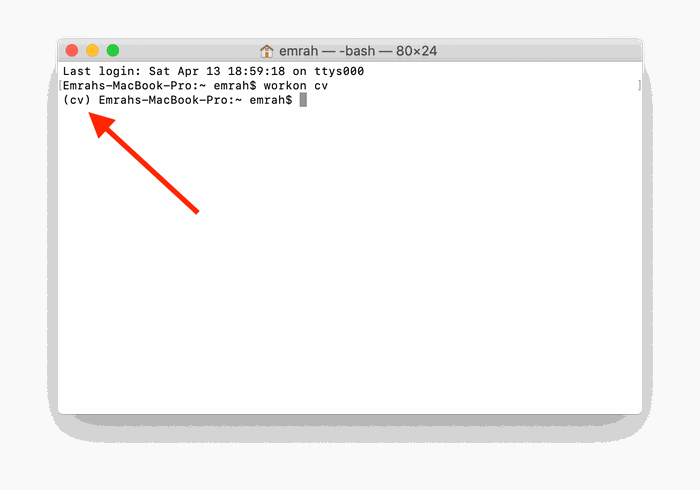
Let's install NumPy while we're in the environment.
$ pip install numpyStep 5: Compile OpenCV 4 for macOS
Compiling from source gives you the most control over your build, compared with package managers like pip, Homebrew and Anaconda.
Let's download OpenCV.
First, go to your home folder and download opencv and opencv_contrib. The contrib repository contains extra modules and functions that we will use often in the future.
Download opencv and opencv_contrib:
$ cd ~
$ wget -O opencv.zip https://github.com/opencv/opencv/archive/4.1.0.zip
$ wget -O opencv_contrib.zip https://github.com/opencv/opencv_contrib/archive/4.1.0.zip
From there, unzip the archives:
$ unzip opencv.zip
$ unzip opencv_contrib.zip
Rename the folders to make them easier to work with:
$ mv opencv-4.1.0 opencv
$ mv opencv_contrib-4.1.0 opencv_contrib
Now that opencv and opencv_contrib are downloaded and ready, let's set up our environment.
Compile OpenCV from source
Now that opencv and opencv_contrib are downloaded and ready, let's use CMake to configure our build and Make to compile it.
Go back to your OpenCV repository, then create and enter a build directory:
$ workon cv
$ cmake -D CMAKE_BUILD_TYPE=RELEASE \
-D CMAKE_INSTALL_PREFIX=/usr/local \
-D OPENCV_EXTRA_MODULES_PATH=~/opencv_contrib/modules \
-D PYTHON3_LIBRARY=`python -c 'import subprocess ; import sys ; s = subprocess.check_output("python-config --configdir", shell=True).decode("utf-8").strip() ; (M, m) = sys.version_info[:2] ; print("{}/libpython{}.{}.dylib".format(s, M, m))'` \
-D PYTHON3_INCLUDE_DIR=`python -c 'import distutils.sysconfig as s; print(s.get_python_inc())'` \
-D PYTHON3_EXECUTABLE=$VIRTUAL_ENV/bin/python \
-D BUILD_opencv_python2=OFF \ -D BUILD_opencv_python3=ON \
-D INSTALL_PYTHON_EXAMPLES=ON \
-D INSTALL_C_EXAMPLES=OFF \ -D OPENCV_ENABLE_NONFREE=ON \
-D BUILD_EXAMPLES=ON ..
Reminder: OPENCV_ENABLE_NONFREE=ON is required for OpenCV 4 if you want access to patented algorithms for educational purposes.
This part is very important. If you get an error, write it in the comments so we can discuss it.
Once it's done, check the following information in your terminal.
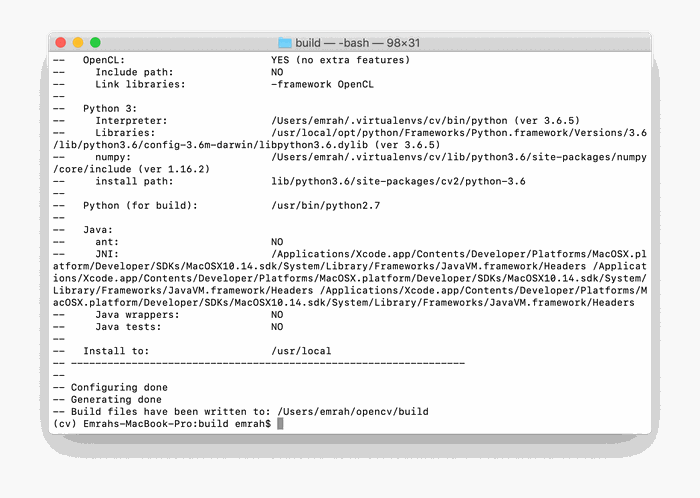
What you're looking for is that both your Python 3 interpreter and NumPy from the virtual environment will be used.
If you don't see that, you probably ran CMake without being "in" the cv virtual environment. If so, no problem: just delete the build folder, activate the virtual environment with the workon command, and run CMake again.
We're ready to go. Start the compilation with:
$ make -j4Note: the -j4 argument is optional and tells make to use 4 CPU cores.
When make finishes, you should see this:
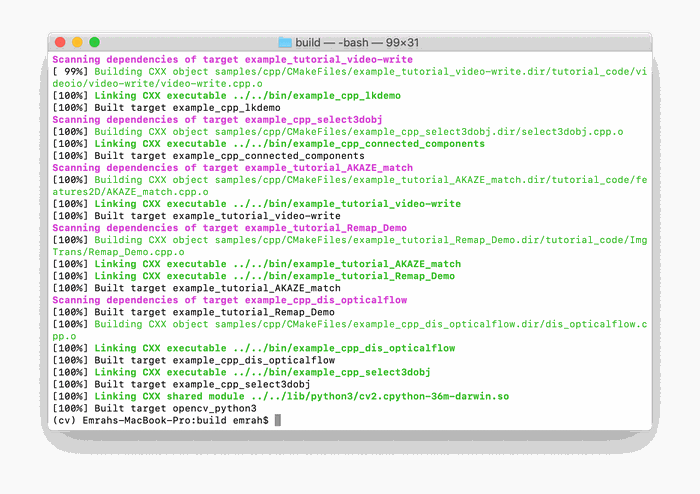
Install OpenCV 4:
$ sudo make installStep 6: Sym-link OpenCV 4 on macOS into your virtual environment's site-packages
Now let's create what's called a symbolic link. We need a link between our cv virtual environment's site-packages and the system site-packages where OpenCV is installed.
$ workon cv
$ python --version
Python 3.6.5
Check your Python version and adjust the lines below to match your own Python version.
$ ls /usr/local/lib/python3.6/site-packages/cv2/python-3.6/
cv2.cpython-36m-darwin.so
Let's simply rename it to cv2.so:
$ cd /usr/local/lib/python3.6/site-packages/cv2/python-3.6/
$ sudo mv cv2.cpython-36m-darwin.so cv2.so
Our last step is to sym-link our OpenCV cv2.so bindings into our cv virtual environment:
$ cd ~/.virtualenvs/cv/lib/python3.6/site-packages/
$ ln -s /usr/local/lib/python3.6/site-packages/cv2/python-3.6/cv2.so cv2.so
For the steps above, be careful with the paths. If you copy exactly the same lines, you may get errors. Instead, check your paths and make sure everything is correct.
Step 7: Test your OpenCV 4 installation
Start a Python shell in the virtual environment and check that cv2 imports without errors and that the version matches.
$ workon cv
$ python
>>> import cv2
>>> cv2.__version__
'4.1.0'
>>>
If you see no errors and OpenCV 4 is installed, you're ready to go!
If you want to build more projects with OpenCV 4, just keep following my blog!
Summary
Today we installed OpenCV 4 with Python bindings on your macOS machine.