Facial landmark detection with Dlib, OpenCV and Python
Finding faces in photos or videos is very cool, but it isn't enough information to build powerful applications. We need more information about the person's face, like its position, whether the mouth is open or closed, whether the eyes are open or closed, and so on.
Last week we learned how to install and configure OpenCV and Python on macOS.
In this article I will introduce Dlib, a library that can give you 68 landmark points. Today we will use dlib and OpenCV to detect facial landmarks in an image.
Facial landmarks are used to locate and represent the salient regions of the face, such as:
- Eyes
- Eyebrows
- Nose
- Mouth
- Jawline
Facial mapping (locating points of interest, or landmarks) with Dlib, OpenCV and Python
What are facial landmarks?
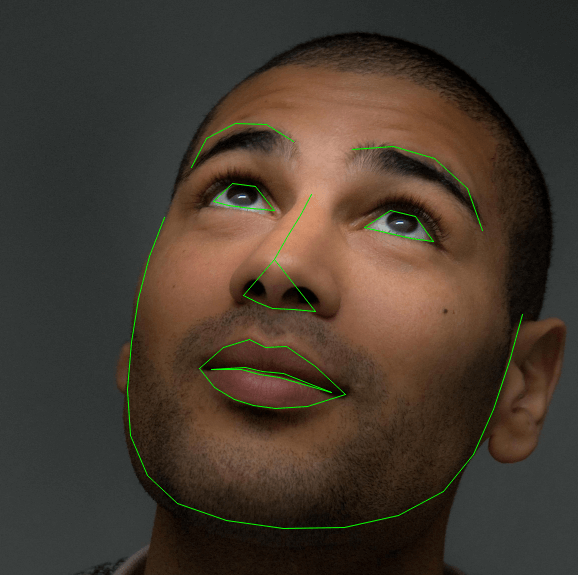
An example of the 68 facial landmarks detected by Dlib's pre-trained shape predictor (source)
Facial landmark detection is a subset of the shape prediction problem. Given an input image, a shape predictor tries to locate the key points of interest along the shape.
Detecting facial landmarks is a two-step process:
- Step 1: Locate the face in the image.
- Step 2: Detect the key facial structures on the face.
Face detection (step 1) can be done in many different ways. The algorithm used to detect the face in the image doesn't matter. What matters is getting the bounding box of the face (that is, the (x, y) coordinates of the face in the image).
Given the face region, we can then apply step 2: detecting the key facial structures in that region.
There are many facial landmark detectors, but they all essentially try to locate and label the following facial regions:
- Mouth
- Right eyebrow
- Left eyebrow
- Right eye
- Left eye
- Nose
- Jaw
What is Dlib?
It's a face detector with pre-trained models. Dlib is used to estimate the location of 68 (x, y) coordinates that map the facial points on a person's face, as in the image below.
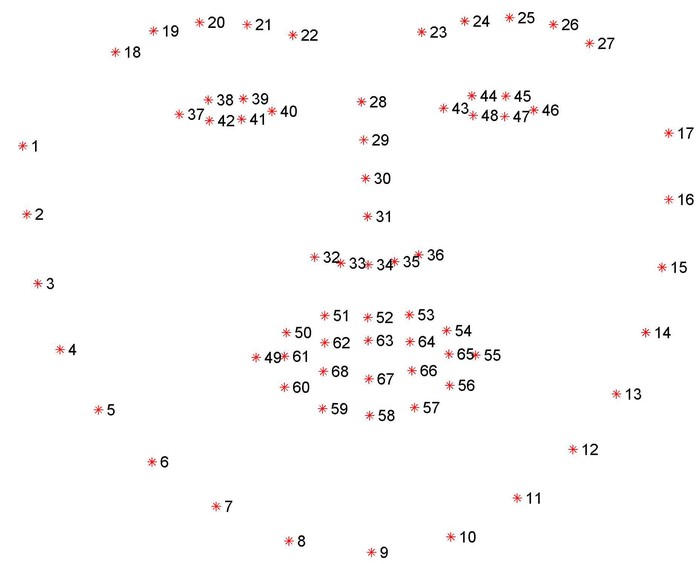
Visualising the 68 facial landmark coordinates from the iBUG 300-W dataset.
These annotations are part of the 68-point iBUG 300-W dataset that the dlib facial landmark predictor was trained on. If you need more detailed annotations, there are other facial landmark detectors.
Facial landmark detection with dlib, OpenCV and Python
We will start by installing the 2 libraries we need.
$ pip install imutils
$ pip install dlib
imutils is a set of convenience functions that simplify image processing tasks such as translation, rotation, resizing, skeletonisation and displaying Matplotlib images with OpenCV and Python.
With these two libraries, we are ready to detect facial landmarks in images.
Create a new file, name it facial-landmarks.py and insert the following code:
# import the necessary packages
from imutils import face_utils
import argparse
import imutils
import dlib
import cv2
# construct the argument parser and parse the arguments
ap = argparse.ArgumentParser()
ap.add_argument("-i", "--image", required=True,
                help="path to the input image")
args = vars(ap.parse_args())
We will use the face_utils submodule of imutils to access the helper functions described above.
--image: the path to the input image in which we want to detect facial landmarks.
# initialise dlib's face detector (HOG-based)
detector = dlib.get_frontal_face_detector()
# path to the pre-trained model
predictor = dlib.shape_predictor("shape_predictor_68_face_landmarks.dat")
Detector = initialises dlib's pre-trained face detector, based on a modification of the standard Histogram of Oriented Gradients + Linear SVM method for object detection.
Predictor = the path to our pre-trained model. In my case it is in the same directory as the script.
We need to detect the face in our input image:
# load the input image, resize it and convert it to grayscale
image = cv2.imread(args["image"])
image = imutils.resize(image, width=600)
gray = cv2.cvtColor(image, cv2.COLOR_BGR2GRAY)
# detect faces
rects = detector(gray, 1)- load our input image from disk with OpenCV
- pre-process the image by resizing it to a width of 600 pixels
- convert it to grayscale
The first parameter of the detector is our grayscale image.
The second parameter is the number of image pyramid layers to apply when upscaling the image before running the detector.
If you want to learn more about pyramid methods in image processing, see this article.
The advantage of increasing the resolution of the input image before face detection is that it lets us detect more faces in the image. The downside is that the larger the input image, the more expensive the detection.
Now we can apply facial landmark detection to each face region:
# for each detected face, find the landmarks
for (i, rect) in enumerate(rects):
    # determine the facial landmarks for the face region, then
    # convert the facial landmark (x, y) coordinates to a NumPy array
    shape = predictor(gray, rect)
    shape = face_utils.shape_to_np(shape)
    # convert dlib's rectangle to an OpenCV-style bounding box
    # and draw the bounding box
    (x, y, w, h) = face_utils.rect_to_bb(rect)
    cv2.rectangle(image, (x, y), (x + w, y + h), (0, 255, 0), 1)
    # loop over the (x, y) coordinates of the facial landmarks
    # and draw them on the image
    for (x, y) in shape:
        cv2.circle(image, (x, y), 1, (0, 0, 255), -1)
# show the output image with the face detections + facial landmarks
cv2.imshow("Output", image)
cv2.waitKey(0)
We loop over each face detection. For each one, we apply facial landmark detection, which gives us the 68 (x, y) coordinates that correspond to specific facial features in the image.
- convert the dlib shape object to a NumPy array
- draw the bounding box around the detected face on the image
- loop over the detected facial landmarks and draw each of them individually
- simply display the output image on our screen
To test the script, run the following command:
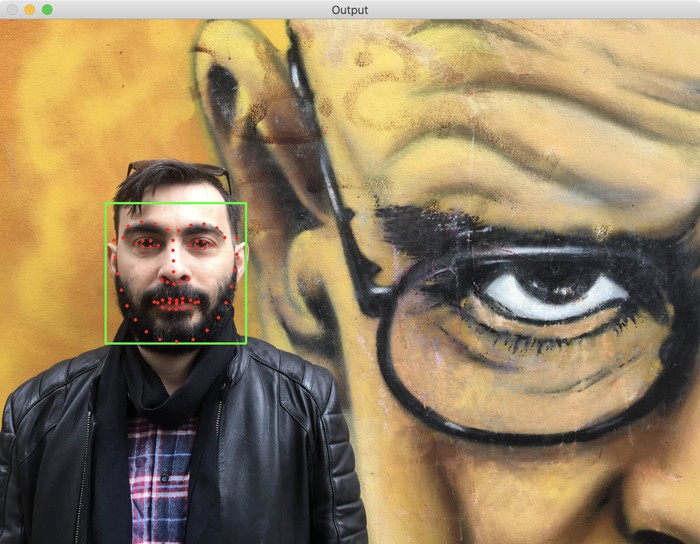
$ python facial-landmarks.py --image images/test.jpg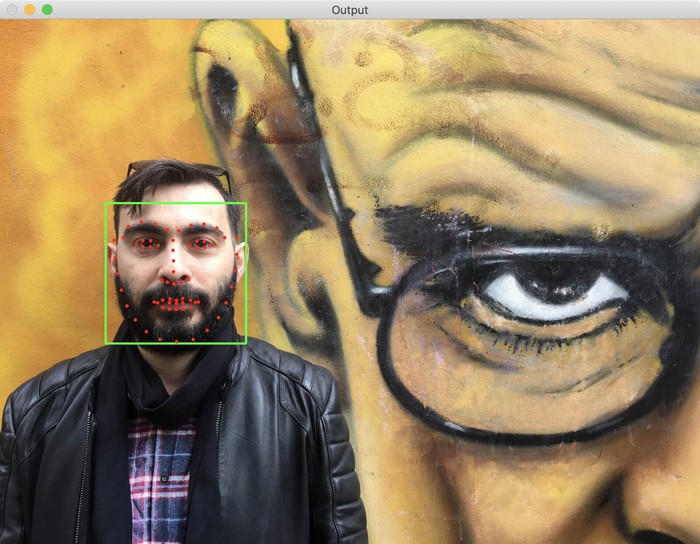
And here is another test with 2 people in the image:
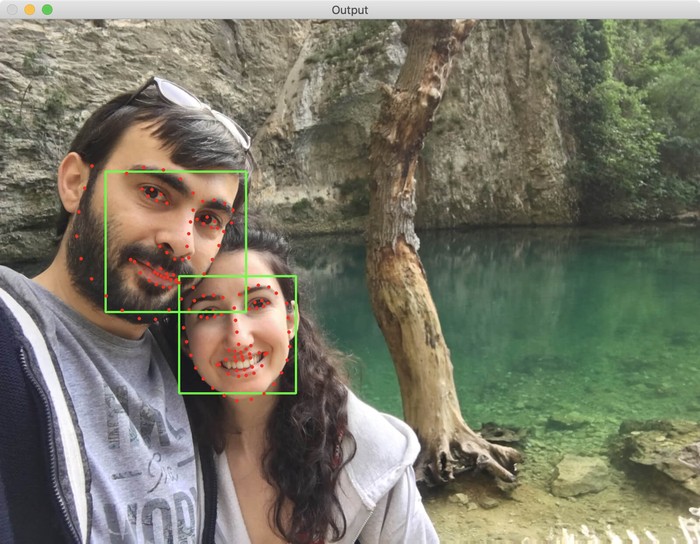
Note that I'm taking the photo from the right side and my face is slightly tilted.
Another test with several people:
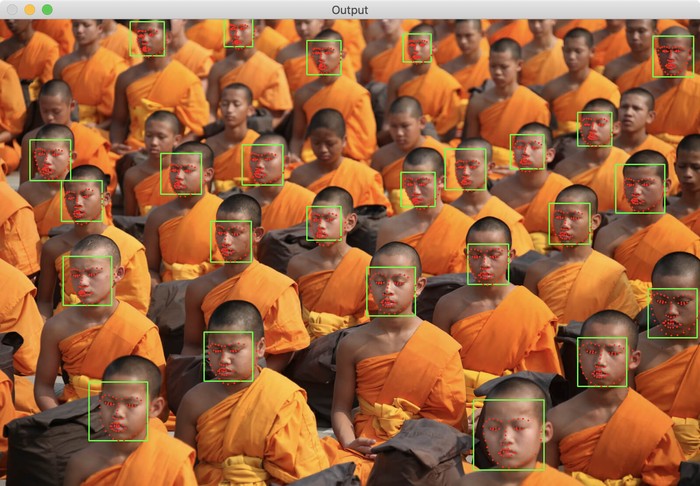
Facial landmark detection for several people in one image (source)
We can't detect every face in this image. The people in the back have blurry faces that are hard to detect.
Bonus: we can detect facial landmarks in real time with a camera.
Summary
We learned what facial landmarks are and how to detect them with Dlib, OpenCV and Python.